Follow Me on Instagram @melimakeupartist

Meli Makeup Artist Instagram

Happy 2018!  It is hard to believe it is a new year and that the first month is quickly coming to an end.  Keeping up with the pace of technology, I actually find that I have been blogging more within my Instagram account than my actual blog website so if you are on Instagram and do not currently follow me, please take the time to say hello and follow me directly @melimakeupartist.

On my Instagram, I post photos of my work on a daily basis along with information on products I use, makeup tips, and general updates.  I am able to deliver great content on there so definitely take the time to check it out if you have not already!

I will still hopefully keep up with posting makeup related material on this website too as I genuinely love to blog in the more traditional way but to stay more connected with my projects and life, I would love to connect with you via Instagram!  Don’t be shy and please don’t forget to say hello! 🙂


Duo Eyelash Adhesive – Black vs. Clear Glue -Does it Make a Difference?

Eyelash glueWhen it comes to applying false eyelashes, Duo Eyelash Adhesive is hands down the eyelash glue of choice by professional makeup artists.  There are a few others that exist but there is nothing that can compare to this brand.

Now this is where things get a little more tricky.  Duo offers a clear glue (it goes on white and dries clear) or a black glue.  So which is best?

The reason behind providing the choice of a black glue is that when it dries, it gives the appearance of wearing black eyeliner.  This saves a step from applying actual eyeliner if it already looks like you are wearing it.  As a concept, I think this is brilliant!

However, the glue can sometimes be a little messy and smudge or move around during the application.  This is where things can get sticky (figuratively) because fixing this is not easy.  It would look like smudged black eyeliner and once it dries, it is fully set.

This is why I always prefer the clear Duo Eyelash Adhesive.  Since it dries clear, it doesn’t show up.  Meaning if the glue smudges during the application, it does not matter as everything is hidden.  

The best technique when applying false eyelashes is to first apply all your eye shadow followed by lining the eyes on top (if you want to skip eyeliner altogether, this is an option too although I always think false lashes should be paired up with a little eyeliner).  Then you can go ahead and apply the false eyelashes over top the eyeliner as close to the lash line as possible.  I sometimes will also take it a step further and go over the top liner again once the glue is dried to make sure the eyeliner is extra smooth and defined.  I also like to do this as it conceals even more the fact that I applied a set of false eyelashes.

Given the choice, I will always recommend the clear Duo Eyelash Adhesive!

The Best Blush for Pink Undertone Complexions

MAC Sincere

MAC “Sincere” blush

Often times when I meet clients with a pink undertone to their skin (as opposed to an olive or yellow skintone), they naturally have a rosiness to their cheeks and do not always like the idea of wearing blush.

As a makeup artist, I find blush to be an absolute necessity in completing a look, whether it is a natural daytime look or for a special occasion.  Why?  Blush instantly makes the skin look more youthful, dewy, and attractive.  Everyone looks good with a little blush!

Even those with a pink undertone should wear blush but the key is using a shade that is not too bright or has too much pink to it.  I always choose a blush that appears almost colorless or one that might seem like it won’t show up too much because on someone with a pink undertone, even a sheer or very natural looking blush will show up because their natural rosiness to their complexion will shine through.

The best blush I recommend for someone who is fair and with a pink undertone is MAC’s “Sincere” blush.  This has a matte finish and shows up without looking too bright.  It gives just a hint of color while also adding some warmth to the face.

The Most Long-wearing Black Eyeliner Pencil

nars-via-veneto

NARS Larger Than Life Long Wear Eyeliner – “Via Veneto”

As a makeup artist, one of the most commonly asked questions I receive is, “What do you think is the most long-wearing black eyeliner?”  Many clients tell me that their eyeliner smudges and there is nothing out there that really lasts all day.

I’ll be honest, I think that most eyeliners, despite being classified as waterproof, are going to move a little bit within a few hours.  They might smudge slightly but they definitely should not run or just magically disappear by the end of the day.

It is definitely not uncommon for an eyeliner to smudge a little and I think it is just a normal thing that happens.  However, when someone tells me that absolutely nothing has worked for them and their eyeliner consistently runs no matter what they use, I recommend what I think to be the best smudge-proof black eyeliner pencil, the NARS Larger Than Life Long Wear Eyeliner in Via Veneto.  (FYI, these pencils do come in various shades).

For starters, this eyeliner pencil glides on rather smoothly and it truly is a jet black type of black.  Some black eyeliners are not very black but this one definitely is which makes it exceptionally good when creating a more dramatic look.  An added perk is that this pencil is designed with a twist up applicator (meaning it does not need a sharpener in between uses) but does also come with a built in sharpener on the opposite end to provide a sharper tip if desired.

When using this pencil, I do want to mention that it is important to always put the cap back on after each application.  I have noticed that the pencil can get dry (and not apply as smoothly along with breaking off more easily) if the cap is not placed on after each use.

This is definitely a makeup kit essential!  I do not use this pencil on everyone as I do not think everyone is in need of a super smudge-proof eyeliner; however, for anyone who emphasizes that this is a makeup concern or is looking for a smokey eye effect, the NARS “Via Veneto” black eyeliner pencil is the best!

Building Your Makeup Wardrobe – What Every Woman Should Own

For starters, happy 2017!  With the beginning of the new year, aside from setting new years resolutions (although I like to do this year round, not just in the beginning of January), I take the time to reorganize everything including my makeup collection.  I find organizing makeup is like organizing your closet.  It is a matter of going through what you currently own, tossing out what you no longer use, and making room for what is needed.

This has lead me to writing this post to discuss what I believe every woman should own in her makeup wardrobe.  Do you have the makeup products that ‘make up’ a complete makeup wardrobe?

Here is a list of the makeup necessities that I think everyone should own in their overall makeup collection:

FACE:

–  Skincare (an everyday moisturizer [ideally with SPF] and I do recommend a serum as this will deliver the most skincare benefits)
–  Primer (I cannot emphasize this enough and this should go without saying, just saying)
–  Foundation (One or two different ones.  I think that depending on the time of year, skin tone can change, so it is good to have two shades along with having different mediums, such as one liquid and one cream foundation)
–  Concealer (I own two, one that is strictly for under eye and one that has extra coverage to cover those occasional blemishes)
–  Powder (for setting the entire foundation)
–  Blush (Start off with at least one but I would say a minimum of three.  I think having different shades of blush makes playing up your makeup more fun)
–  Highlighters (I have various ones, I recommend owning both a liquid/cream type and a powder)
–  Bronzer / Contouring powder (I think only one is truly needed to do the job)
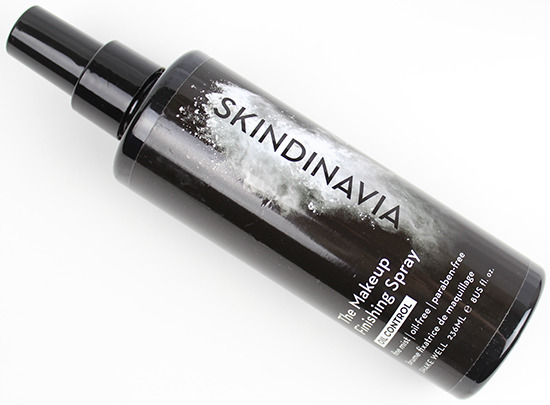
* Setting spray (I starred this as I think this can be optional)

EYES:

–  Eyeshadow Primer (Again, this is just as important as face primer.  All you need is one good one for everyday)
–  Eyeshadows  (I would say a minimum of five colors.  To create the most basic everyday eyeshadow application, you would need 3-4 eyeshadows.  [A lid color, highlight, crease, and the extra would be an outer crease color for extra depth/contour].  Over time, I think it is good to build this up to at least 10 shades.  The best way to do this is to invest in a good eye shadow palette which provides an assortment of colors to play with)
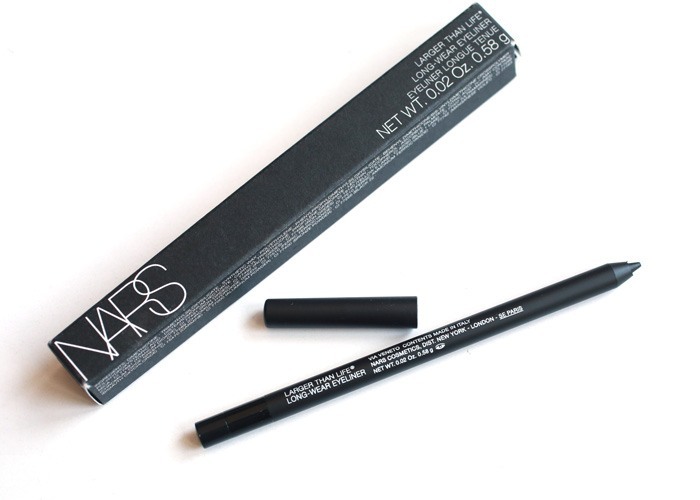
–  Eyeliner – top liner (I put these in separate categories as I truly believe the top liner needs to be a liquid or gel formula.  I would say at least one black and one of your choice such as brown, purple, blue, etc.  Having various eyeliners can really change up the look)
–  Eyeliner – bottom liner  (For the bottom liner, I recommend pencil only.  Liquid can be used but I think it can look too harsh.  Again, as mentioned above, at least one black and then another color of your choice)
–  Eyebrow powder/pencil (For myself, I strictly use powder for filling in my brows and have been doing this ever since I became a makeup artist.  If you prefer pencil, then get an eyebrow pencil.  Either way, I think almost everyone can benefit from a brow product of some sort for filling in any sparse areas and defining their shape)
–  Mascara (I think having one great mascara is all that is needed although I do also think it is nice to own two different ones, including a mascara primer for building the lashes prior to mascara)
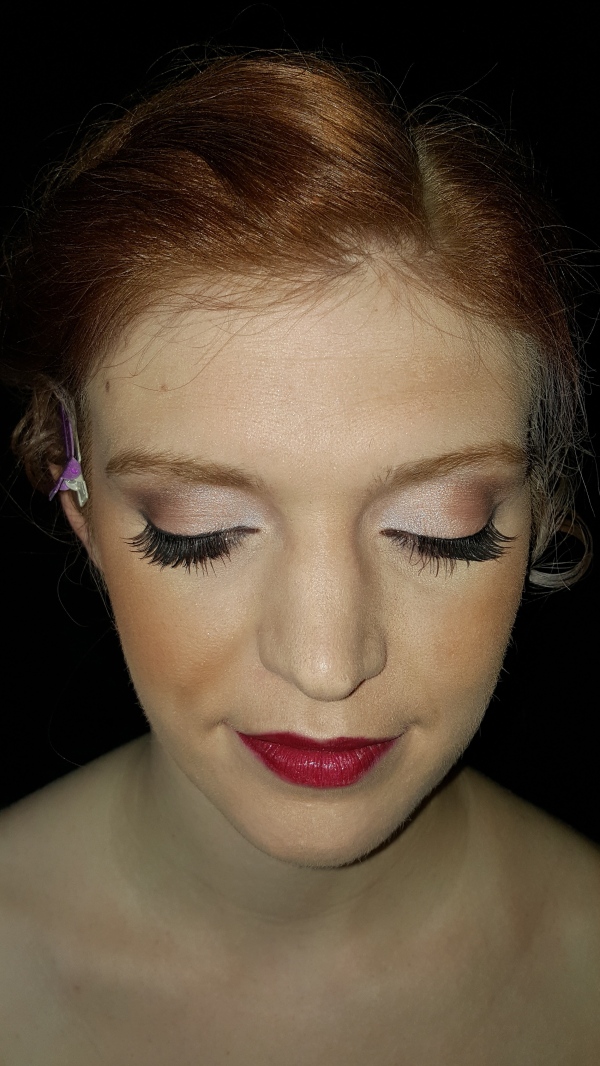
*  False eyelashes (This is optional as many people do not wear false eyelashes too often but I think it is always good to have a couple pairs for special occasions. If you are uncomfortable applying them yourself, bring them to your makeup artist or practice applying them yourself.  As a professional makeup artist, you better bet I keep a good stash of false eyelashes in my makeup vanity!)   

LIPS:

–  Lipsticks (Ideally, everyone should have a minimum of 5-10 different shades in their collection.  Lipsticks are makeup accessories, so depending on the look, it is nice to have shades ranging from natural and everyday to more statement colors such as reds for going out)
 Lip glosses (Depending on the type of person you are, this number can range.  For me personally, I own a ton of lip glosses but I really only gravitate toward the same three.  Mainly because I do not like wearing lipgloss too much to begin with)
–  Lip liner (I do not think lip liner is an absolute makeup necessity but it is good to own at least one for the days you want to play up the lips.  I also believe one good lip liner can go with most lipsticks.  If you have a real variety of lipsticks in your collection, then more lip liners are needed for matching purposes)
–  Lip conditioner ([such as lip balm or Chapstick].  I personally keep this by my nightstand)

important-makeup-brushesLast but surely NOT least, let’s NOT forget about the tools needed!  By tools, I am talking makeup brushes!  As a makeup artist, I have always said, having all the makeup in the world means nothing if you do not have the proper brushes to apply the makeup.  Makeup brushes may seem expensive, but there is no greater investment.

Here is a general list of what will be needed along with my personal recommendations and favorites.  I am trying to keep this fairly basic although it is always good to build up your brush collection over time.  Depending on your makeup collection, owning multiples of certain brushes may be required.

FACE BRUSHES
:

–  Foundation brush (I like the MAC #190, this is always a classic for applying liquid foundations although there are many brushes out there that are essentially the same thing)
–  Powder brush (for applying all over powder, I use the Chanel “touch up” buffer brush)
–  Blush brush (I recommend MAC #129, this has always been my go to blush brush for many years, although I recognize there are many blush brushes out there that are almost the same)
–  Contour brush  (Personally, I like a tapered one so I use the MAC #138)
–  Highlighter brush (For powder highlighting application only [creams/liquid highlighters, I do use my finger tips instead of a brush], I use the MAC #165 which is tapered also and is pretty much the baby version of the MAC #138)
*  All over buffer brush (This is optional but I do use this to go over and smooth out the contouring and blush application.  The MAC #150 or any brush that is fluffy will work)

EYE BRUSHES:

–  Eyeshadow primer brush (If you are using a cream based eyeshadow primer, which is what I use and recommend [vs. one that is liquid and comes in a tube with an applicator], then a brush is needed.  I have been using a brush by Crown brushes which is comparable to the MAC #242).
–  Lid eye shadow brush (For applying shadow on the eyelids only, I use the MAC #239.  This has always been my favorite)
–  Highlighter eye shadow brush  (Believe it or not, for this, I use an Estee Lauder brush that came in a gift set that was given to me when I was 16 years old!  It is my oldest brush that I use to this day.  It does not have a number so I cannot say what it is but I can make a recommendation and suggest getting the MAC #224 for highlighting under the brows)
–  Crease Blending eye shadow brush (As I am sure I have said this before, I cannot blend eyeshadows without the MAC #217 brush.  In my personal collection, I own five of these brushes!  In my professional makeup brush belt, I also own five!  This is mandatory to own, at least one but I own many because my crease color can vary and this prevents me from having to clean the brush in between every single usage)
Angled brush – One for brows (if you are using a powder) and one for eyeliner (only if you are using a gel eye liner)  If you do not use either product, you can forgo this completely.  If you use both, you will need two separate ones and I would recommend the MAC #266 for eyeliner and the MAC #208 for the brows.

LIP BRUSHES:
[Personally, I do not own any lip brushes in my collection other than in my professional makeup brush belt]

Keep in mind that this is a general makeup guide and will vary depending on your lifestyle and what you feel most comfortable wearing.  Overall, if you follow this, you will have a complete makeup wardrobe!

Matte vs. Shimmer – Where on the Face and Why Texture is Important

gigi-hadid-makeup

For starters, let me introduce the makeup model I chose for this post, the iconic Gigi Hadid.  She is definitely one of today’s modern muses for her soft femininity and her makeup is always stunning.

The leads me to this post and a makeup topic that is overlooked but a crucial one in terms of makeup product selection and placement.  Often times the terms matte and shimmer (or other terms include dewy, shiny, glowing, and radiant) are used when describing a makeup product.

Matte:  A matte texture has no shine whatsoever and can appear to have a velvet or powder finish.  Typically matte products appear more natural looking.

Shimmer:  A shimmery texture provides a shiny and glowing effect and stands out more on the face by reflecting light.

As a general rule, shimmer accentuates features more (more specifically with highlighting and “strobing”–the modern makeup terminology for essentially the same thing) because of how the light hits while matte textures do the opposite by appearing almost flat and do not pick up light at all.

Areas of the face that should typically always be matte:
– Forehead
– Chin
– Nose
– Under the cheekbones (by the use of contouring)
– Eye shadow crease and outer crease (I generally opt for matte shadows; however, depending on the look, shimmery shadows can work)
– Outline of the lips (in other words the lip liner)
– Eyebrows

Areas of the face that should typically always be highlighted (shimmery/dewy/radiant):
– Brow bone (the space right under the eye brows although this sometimes can be matte depending on a person’s preference)
– Top of cheekbones
– Cupid’s bow (the space between the nose and upper lip)
– Inner corners of eyes (optional but ideal for eye brightening)
– Center of eyelids (optional as well, this depends on the look but placing shimmer in the center of the lid catches the light and appears brighter)
– Center of the nose (optional, I personally do not do this much at all but if you look at magazines, the center of the nose always seems to be highlighted)

Areas of the face that can be either matte or shimmery:
– Lips
– Eye makeup in general
– Center of cheeks (in other words the blush color–personally, I typically always choose MATTE for the center of the cheeks but again, this is a personal preference and depends on the overall look being achieved which is why I put this into the either category)
– Skin (in reference to the overall effect of the skin, some people prefer their skin to look matte while others may opt for a more dewy finish that provides a glow)

Keep in mind with the last category, why it does not make too much of a difference is because those areas of the face are dictated by personal preference, style, and makeup trends.  For example, matte lip products are very popular at the moment whereas there have been times shimmery lips are more trendy.  Another example is with blush, a person with more oily skin is going to prefer to stick with matte blushes only because it reduces oil throughout the day while a person with dry skin may only where shimmery blushes because the skin will appear to look less dry and more radiant.

Back to the beautiful image of Gigi Hadid, which facial features are matte?  What areas of her face provide more shimmer?  When examining this image up closely,  it appears that the overall effect is more on the shimmery side.  More specifically, the gold eye shadow on the entire eye, the lips, the skin overall is more dewy, tops of cheekbones, and the center of nose.  In terms of matte textures on her face, I would the eyebrows, outline of her lips, blush, and the contour under the cheekbones.


Best Foundation for Makeup Artist Kit – Cinema Secrets Ultimate Foundation 5-in-1 Pro Palette

cinema-secrets-palettesAs a makeup artist, I myself am always curious as to what foundation other makeup artists like to stock in their professional makeup kits.  With so many options today, I would say most makeup artists like to carry a few different options and that there is not necessarily one universal foundation brand that makeup artists respond as “the one and only foundation.”

Personally, I think less tends to always be more and I do not like to carry too many foundations in my kit.  Lately, most of my clients opt for the airbrush makeup application in which I strictly use Dinair, so carrying a ton of foundations is not a necessity in my makeup kit.

When I do a traditional makeup application (applied with a standard foundation brush and liquid/cream foundation), I tend to stick to Cinema Secrets Ultimate Foundation 5-in-1 Pro Palette.  This foundation truly is great!  Best of all, I actually have been using this around the time I first began my career in makeup artistry.  I discovered the brand the first time I attended The Makeup Show in NYC and have been pretty hooked since.

I like this foundation for many reasons.  For starters, it comes in a palette which in and of itself is much more convenient than carrying multiple bottles of foundations which can be bulky and heavy to carry around.  Secondly, being it is a cream consistency, it is very blendable and I can easily manipulate the coverage ranging from sheer coverage to more full coverage along with mixing the colors more easily to get the most accurate color match.  There are also many palette combos to choose from.  I own the 400, 500A, and 500B series which tends to cover most skintones.

Also, I use these palettes as my concealer palettes for undereye circles and other skin imperfections.  I am a huge believer than a good foundation can also serve the purpose of a concealer.

I highly recommend the Cinema Secrets foundation palettes to any professional makeup artist for the convenience and the quality.  I also want to mention that I do as a second option carry the NARS Sheer Glow foundation in my kit.  I own almost every shade as I like the color spectrum offered (especially for darker complexions) and the coverage is very smooth.

The #1 Makeup Trick to Offset Close-Set Eyes

kristen-stewart-cover-of-wFive years ago, I remember when I had seen Kristen Stewart on the cover of this issue of W magazine, I had thought to myself, “Wow, this is the best I have ever seen her look.”  Getting over the reality that this was also probably heavily photoshopped, let us give props to where props are due, her makeup artist.  The makeup artist who created this look truly transformed her  and knew how to enhance her features with the right makeup placement to make her look strikingly captivating.  Which leads me to a great point (and inspiration for this post I might add):  Isn’t it amazing what a little makeup can do?

What are close-set eyes?  Close-set eyes are when the eyes are distanced closer towards the center of the nose and visually do not look proportionate.  I will go ahead and make a true makeup artist confession right now–that as a highly visual person, this is a visual turn-off for me.  However, there is a light at the end of the tunnel as this can be visually corrected with the right makeup techniques!  Makeup can actually make the eye distance look more balanced.

The best way to offset close-set eyes is with a dramatic winged liner.  As seen on the cover, her winged liner is overly extended and exaggerated.  Although for most people, this can look too over the top and garish in which I would not recommend it as an everyday look necessarily, it actually works wonders for anyone that has close-set eyes.  Reason being that the defined black winged liner is visually pulling the eyes away from the center of the face and away from the nose.  If you look at the images of Kristen Stewart closely, you would never really even know she has close-set eyes to begin with thanks to a dramatic black winged liner.

I also want to add in that it is best to avoid adding lighter colors (such as a white shimmer eyeshadow which is most often done to brighten the eyes and make them pop) towards the inner corners as this would only bring more visual attention again towards the center of the face when the main focus is to change the focal point by bringing more emphasis towards the corners of the eyes to pull the eyes away from the nose.


Brittany’s Bridal Makeup

brittany-makeup-1brittany-makeup-2

Brittany’s bridal makeup reminds me of Hollywood glamour.  She does not typically wear too much makeup but knew she wanted a red lip.  To balance the bold lip color, I kept the eyes soft with my choice of eyeshadow colors.  Even though the eyes are not too dramatic, they still stand out with black defined winged liner on the top and defined lashes.  She carries off the look beautifully as seen in the photos!

Complexion:  Maybelline Baby Skin Instant Pore Eraser Primer, Cinema Secrets Ultimate Foundation Palette (used as concealer), Dinair Glamour Airbrush Foundation in Alabaster and Light Golden Beige (mixed), Laura Mercier Secret Brightening Powder (to set the entire foundation), MAC Mineralize Skinfinish in Medium Dark (for cheek contour), NARS Highlighting Blush in Albatross (cheek highlight), MAC blush in Sincere

Eyes:  MAC Pro Longwear Paint Pot in Painterly, MAC eyeshadows:  Naked Lunch (lid), Retrospeck (brow highlight and little bit in inner corner of the eye), All That Glitters (crease), Folie (outer crease), MAC Pro Longwear Fluidline in Blacktrack (top liner winged), NARS Larger Than Life Long-Wear Eyeliner in Via Appia (bottom liner), Revlon false lashes in “Defining”, Maybelline Great Lash Waterproof Mascara in Very Black (top and bottom lashes), MAC eyeshadow in Omega and Cork (brows)

Lips:  MAC Pro Longwear Lipcolour in Perpetuate Flame [discontinued], MAC Lip Pencil in Cherry (this did not quite match the lip color so I had to mix it a little bit with another MAC cremestick lip liner in Raw Refined [discontinued]), and a little clear top coat gloss over it

Brittany makeup 3.jpg

The Purpose of Makeup Setting Spray and the Best One to Use

skindinavia-the-makeup-finishing-spray-oil-control

When applying makeup, it is important to consider the longevity and how long it is going to last throughout the day.  A professional makeup application is meant to stay from the moment of application til the end of the day.

One might wonder, what are some products used to ensure the makeup is going to last this long?  Aside from investing in good primers (both for the face and for the eyes), I do recommend getting a makeup setting spray which is used at the very end, immediately after the makeup application is complete.  It is also a very simple step as it is just sprayed lightly all over the face.

The purpose of a makeup setting spray is to lock in the makeup so it does not crease, transfer, disappear, or need any touch ups.  

The makeup setting spray I have been using for years and that I always keep stocked in my makeup kit is the Skindinavia Makeup Finishing Spray – Oil Control.  They do offer different variations of makeup finishing sprays that essentially do the same thing but I like to get the Oil Control because I think most people want their face makeup to stay relatively shine free and matte for the day.  Furthermore, this makeup setting spray ensures that the makeup will last for up to 16 hours.  What I love most about this spray is that it is lightweight (it does not feel sticky) and it has a patented temperature control technology that actually keeps the face cool which prevents shine to build up throughout the day.  I think that in itself is amazing!